Creating a New Quote
This guide walks you through the complete process of creating a new professional quote using TurboQuote. You'll learn how to initiate a quote, set up a company with contact information, and finalize the quote for your client.
What You'll Accomplish
By the end of this guide, you will have:
- 🧾 Created a new quote from the TurboDocx home screen
- 🏢 Added a new company record with industry classification
- 👤 Set up contact details for the company
- ✅ Named and submitted your completed quote
Creating your first quote takes just a few minutes. Follow along and you'll have a professional, ready-to-send quote in no time! 🚀
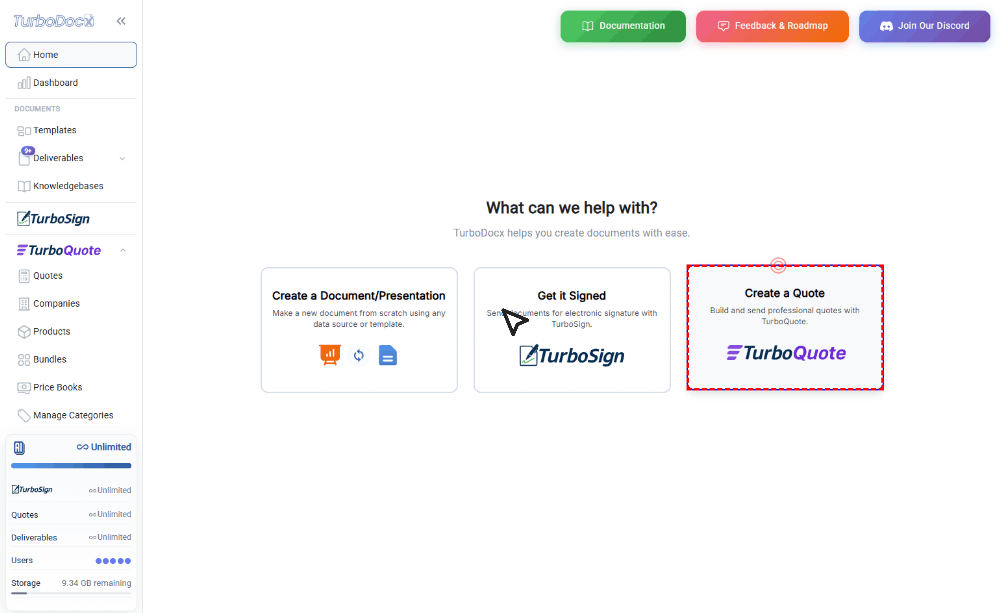
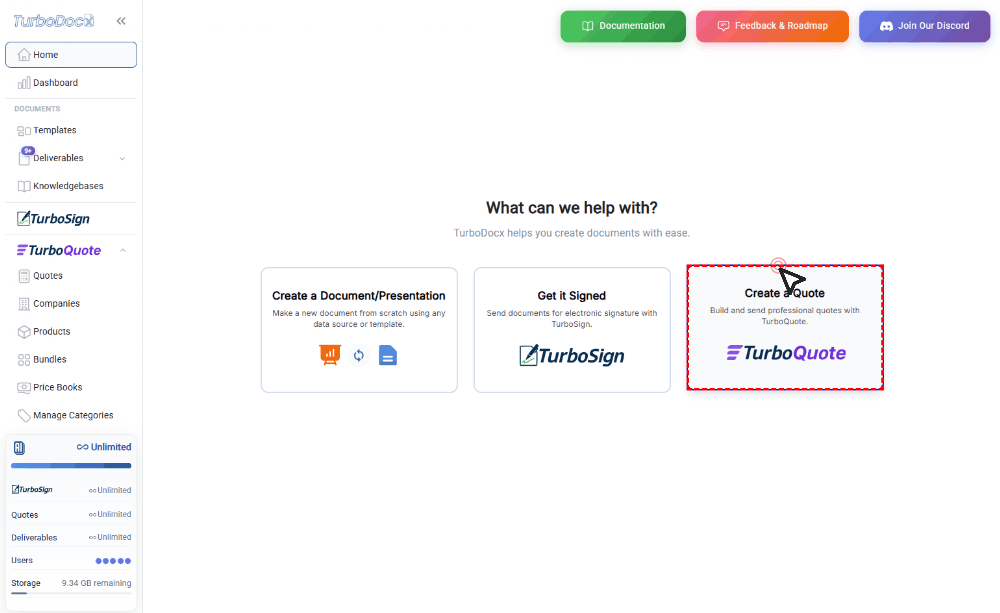
Step 1: Start Creating a New Quote from the Main TurboDocx Home Screen
Begin the process of creating and sending a new professional quote using TurboQuote. The main options section provides the entry point to initiate this workflow, setting up the workspace to add client details, products, and pricing.
Instruction:
- Click on the Create a Quote card in the main options section to start building a new quote.
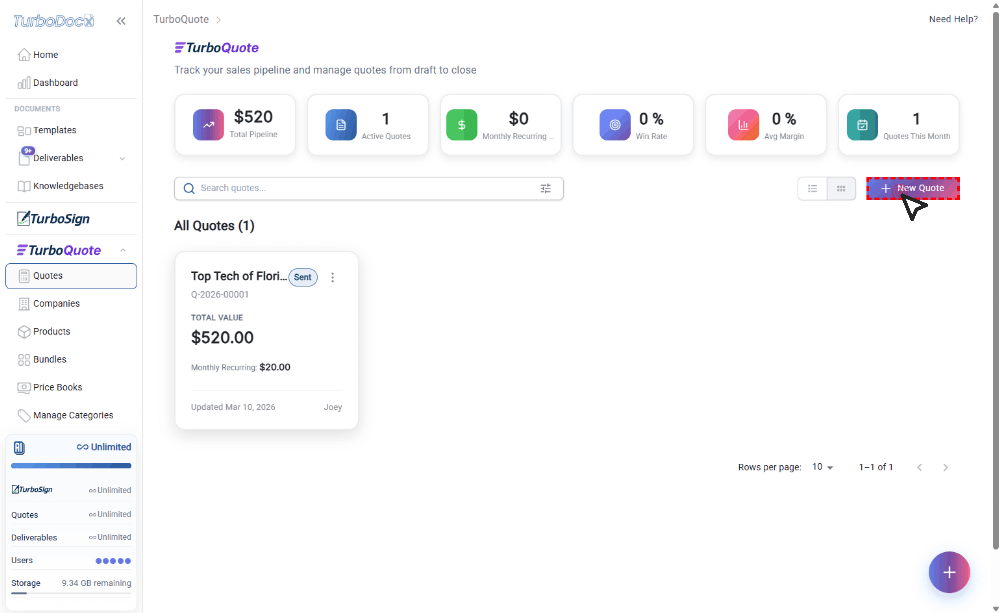
Step 2: Initiate Quote Creation from the TurboQuote Quotes List Page
Access the TurboQuote module directly to begin creating a new quote. This will transition to the quote creation interface where detailed quote information can be provided.
Instruction:
- Click the + New Quote button located in the top-right toolbar of the quotes page.
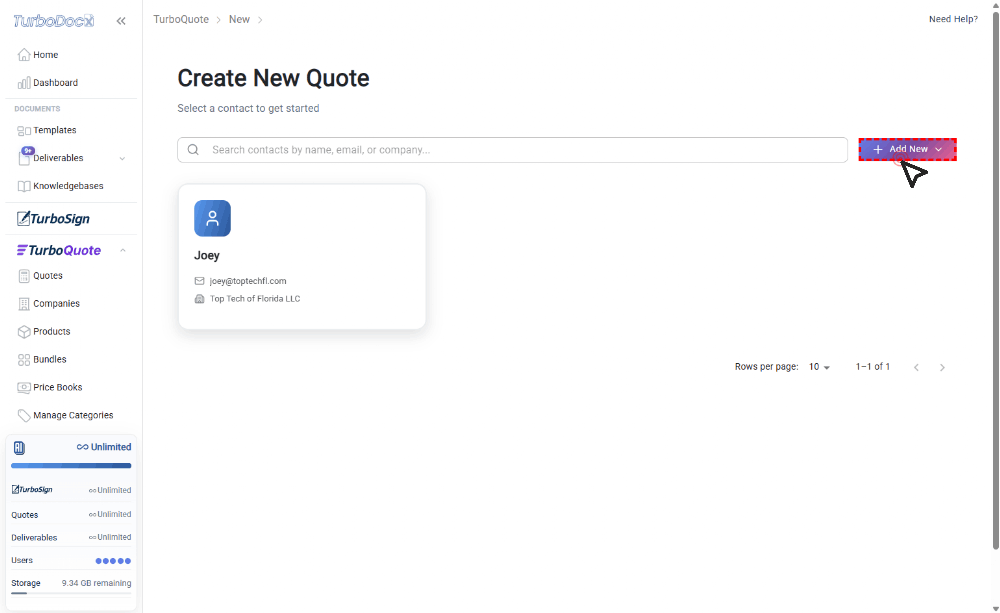
Step 3: Open the Add New Menu on the Quote Creation Page
Access options to add new contacts or related items while building the quote. This menu exposes additional creation flows necessary for completing the quote setup.
Instruction:
- Click the purple Add New button on the quote page to reveal more creation options.
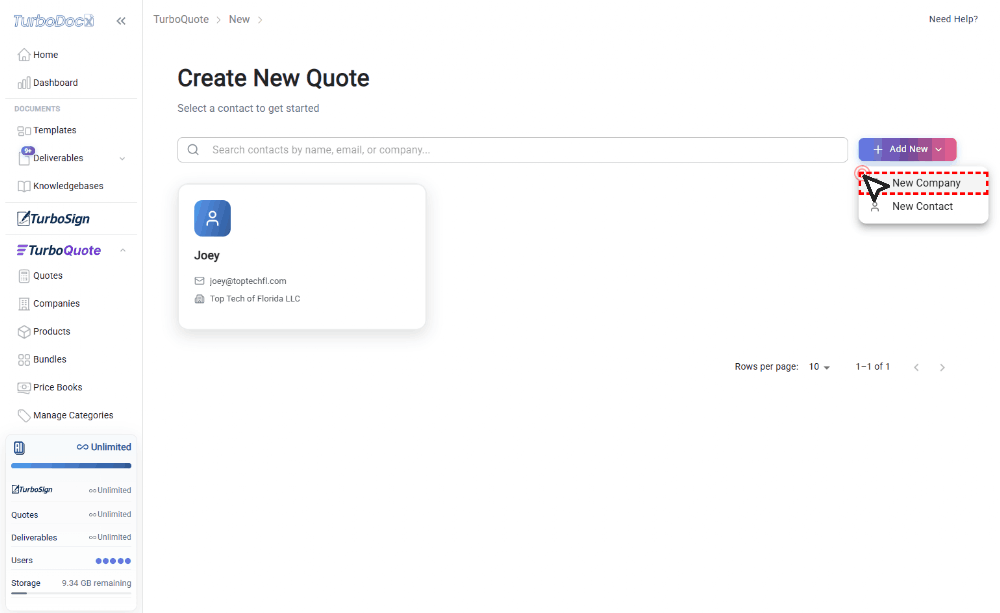
Step 4: Select New Company from the Add New Dropdown
Create a new company record to associate with the quote. This ensures the quote is linked to an up-to-date company profile for accurate tracking and communication.
Instruction:
- Click the New Company option in the dropdown menu under the Add New button.
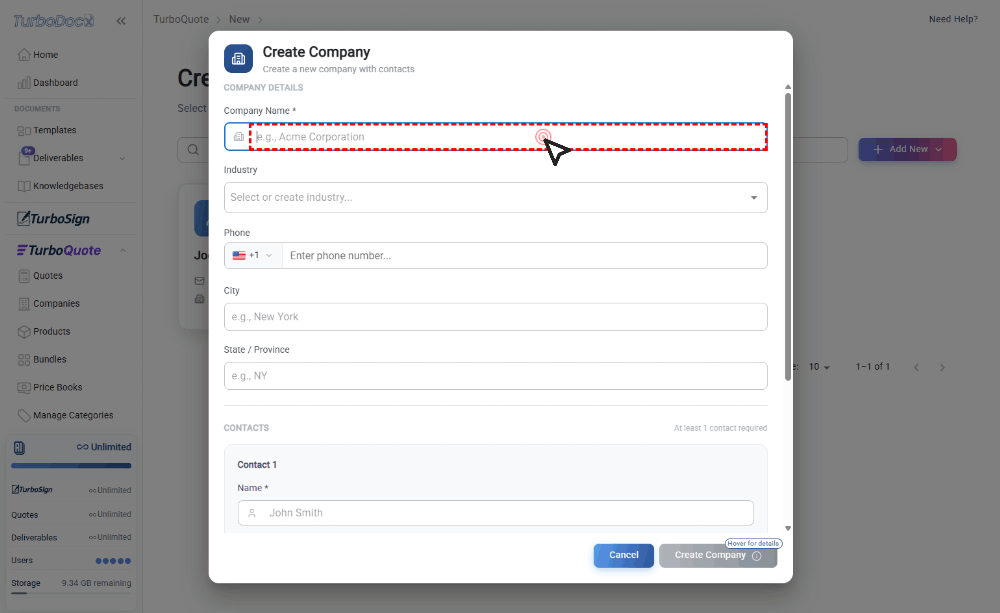
Step 5: Focus the Company Name Field in the Create Company Form
Begin entering the company's name, which is the primary identifier for the new company record.
Instruction:
- Click on the Company Name text input field at the top of the Create Company form to activate text entry.
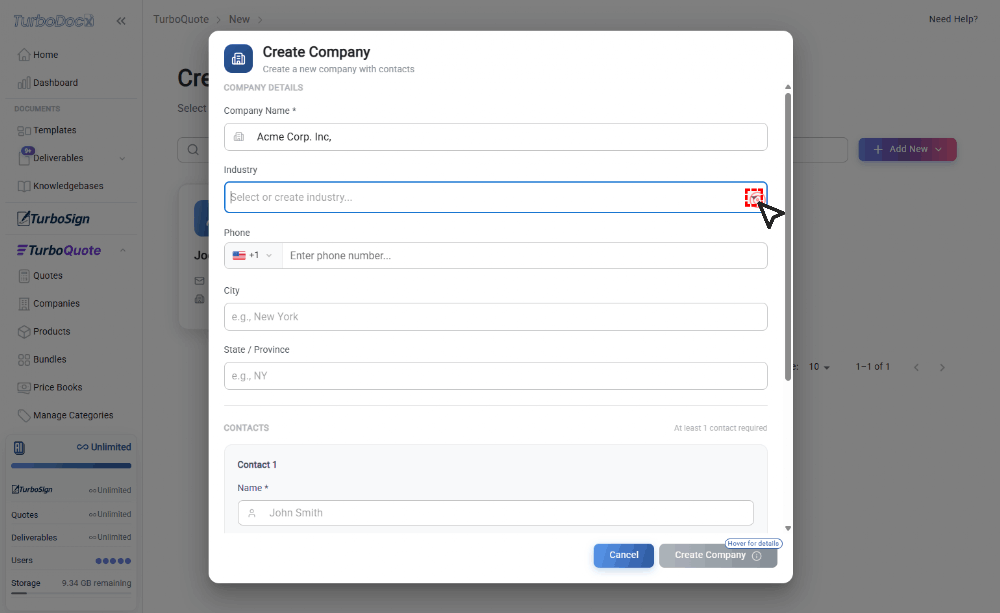
Step 6: Open Industry Selection Options in Create Company Form
Access the interface to select an industry or create a new one, specifying the business category associated with the company.
Instruction:
- Click the icon button at the right side of the Select or create industry... field within the Create Company form.
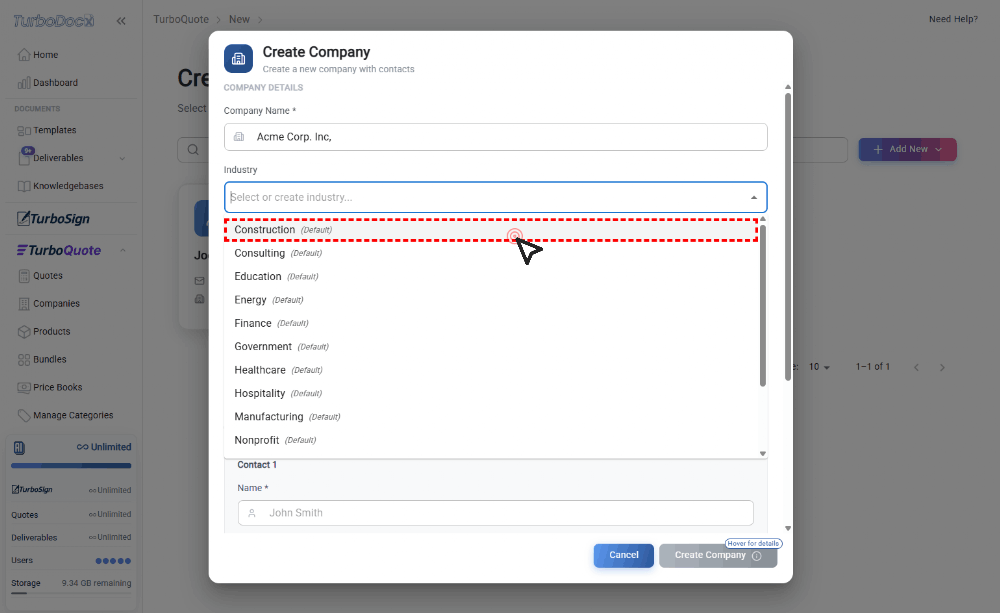
Step 7: Choose an Industry from the Dropdown
Define the company's industry by selecting the appropriate preset industry from the dropdown list.
Instruction:
- Click on the desired industry option (e.g. Construction (Default)) in the Industry dropdown list to select it for the company.
Step 8: Edit the Contact Name Field in the Create Company Form
Focus on the primary contact's name field to enter or modify the contact person's full name.
Instruction:
- Click on the Name text input field under the Contact 1 section in the Create Company form to activate the text cursor.

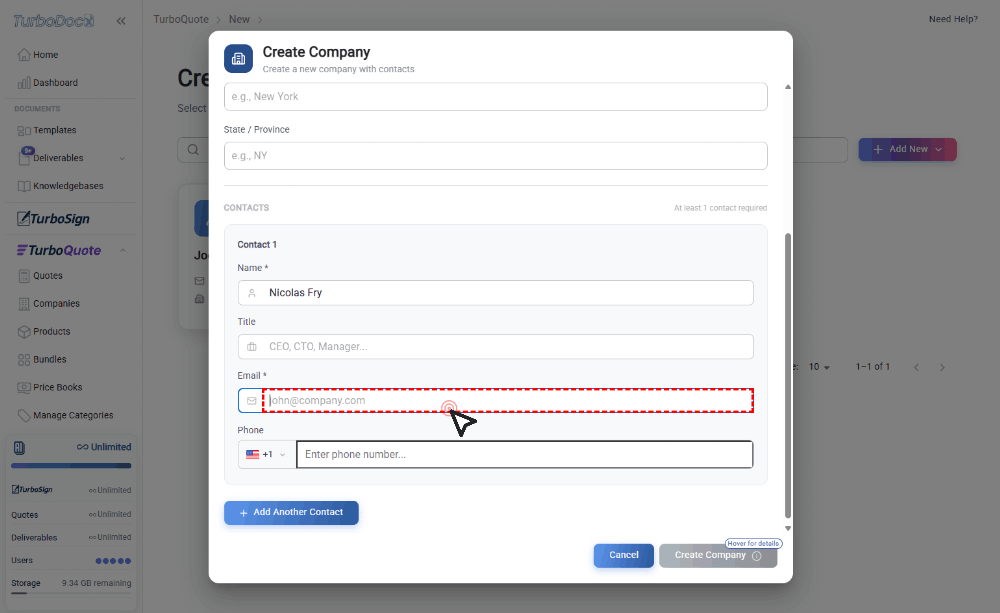
Step 9: Enter the Contact Email Address
Prepare to enter or update the email address for the primary contact, which is essential for communication related to the quote.
Instruction:
- Click on the email address text input field under Contact 1 in the Create Company form to focus it for editing.

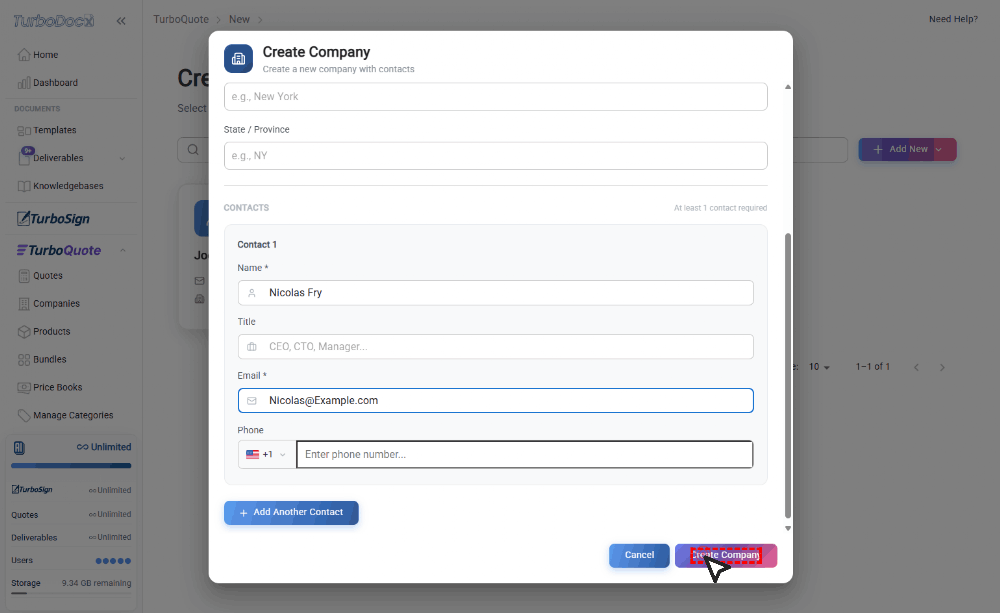
Step 10: Submit the Create Company Form
Complete the creation of the new company record along with its associated contact details by submitting the form.
Instruction:
- Click the Create Company button located at the bottom-right of the modal to submit the form.
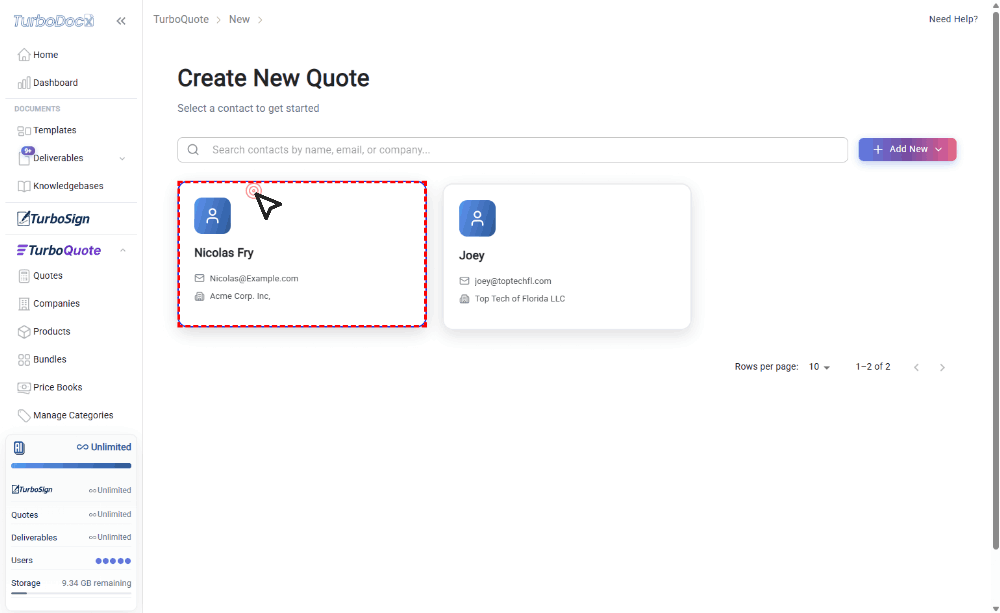
Step 11: Select the Contact Card for the New Quote
Associate the newly created contact with the quote by selecting their contact card.
Instruction:
- Click on the contact card labeled with the contact's name to select this contact for the quote.
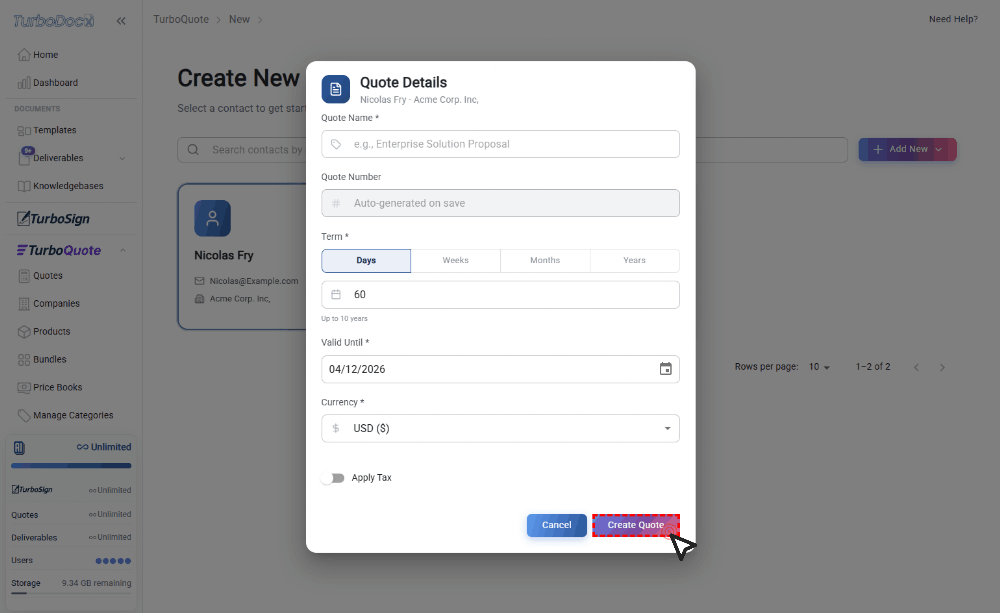
Step 12: Submit the Completed Quote
Finalize and create the new quote record by submitting the detailed quote information after linking company and contact.
Instruction:
- Click the blue Create Quote button at the bottom-right of the Quote Details dialog to submit and create the quote.
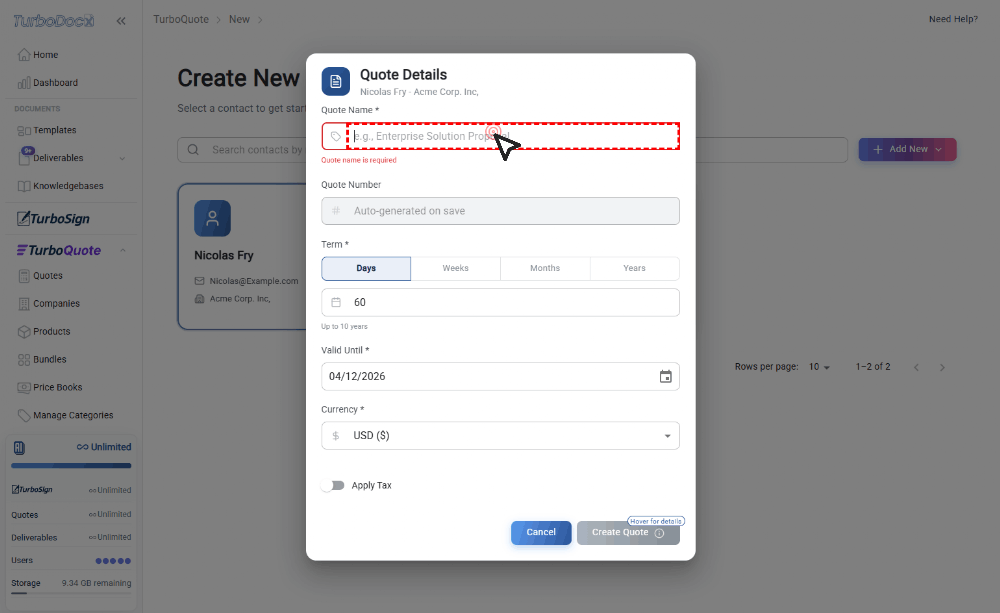
Step 13: Name Your Quote
Name the quote appropriately to identify it clearly for future reference and client communication.
Instruction:
- Click on the Quote Name text input field at the top of the Quote Details modal to begin typing the quote name.
Summary
You've successfully created a new quote in TurboQuote! Here's a recap of what you accomplished:
- Initiated a new quote from the TurboDocx home screen or TurboQuote quotes list
- Created a new company record with industry classification
- Added contact details including name and email
- Selected the contact for the quote and submitted the final quote
Your quote is now ready for you to add line items, pricing, and any additional details before sending it to your client.